
Even monsters have their own weaknesses, and Traxxas’ X-Maxx is no different. Tearing up rough terrain and smashing everything down on its tracks is what it does, but it could also make them prone to tyre failure. Tyres coming off the wheels is a common problem for these monsters, as they could be too powerful even for their own bodies. So if your tyres are a little worse for wear and tear and you think they need a little fixing, we have this guide for you to get your Traxxas X-Maxx up and running.
Summary
- What is the TRAXXAS X-Maxx?
- How to Repair your TRAXXAS X-Maxx Tyre (Step-by-Step Instructions)
- Watch and Learn from Following our Video
What is the TRAXXAS X-Maxx?
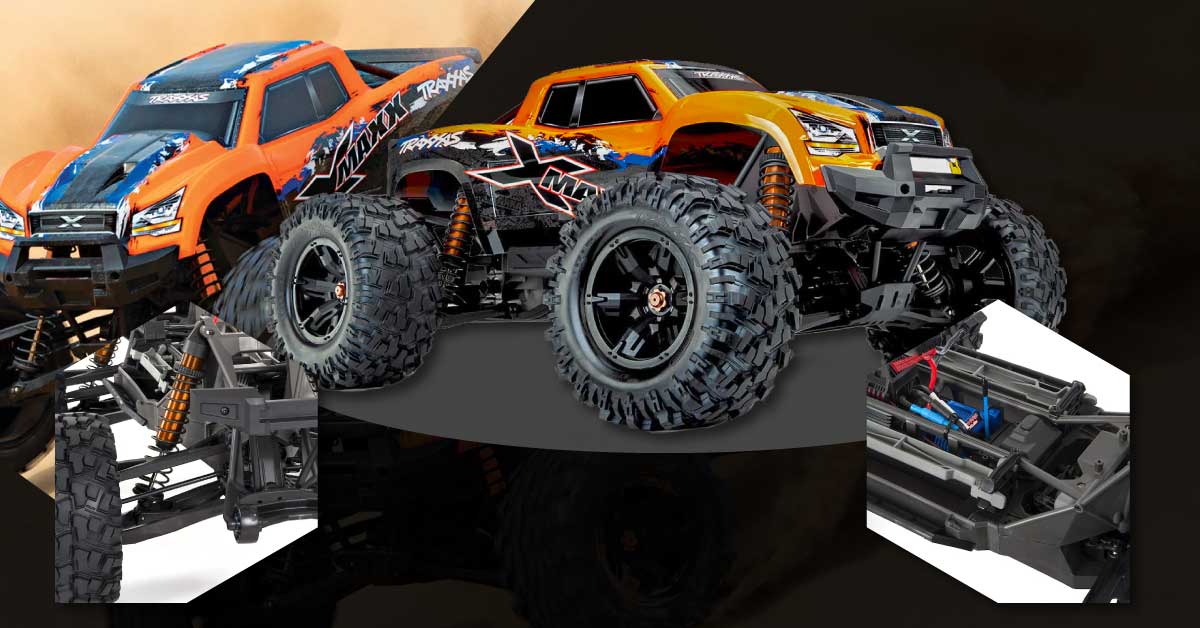
The Traxxas X-Maxx is a 4X4 electric monster truck that runs on a brushless motor. It has over 30 volts of extreme 8S power that can unleash a jaw-dropping acceleration of over 50 miles per hour. This ultimate monster truck is engineered to conquer the most extreme terrain and take brutal real-world punishment in stride, the X-Maxx is the definition of Traxxas Tough. It comes fully assembled and ready to race with a TQi 2.4GHz radio system and Traxxas Stability Management covered by a ProGraphix painted body.

Get the TRAXXAS X-Maxx Brushless Electric Monster Truck here
A Step-by-Step Guide on How to Repair Your Tyres
The X-Maxx Monster is prone to tire failure, and with all the running it does off-road, it is only inevitable. If your tyres need to be repaired, here is a step-by-step guide on how to do it:
Materials you will need:
- 17 millimeter nut driver
- Isopropyl alcohol
- Rag or a piece of cloth
- Thin superglue
- Accelerant (Optional)
How to Repair Your Tyres
Step One: Take off the Tyres & Wheels
Using a 17-millimeter driver nut, remove the nut that secures the wheels to the truck. To remove both the tyres, firmly pull them away from the truck. The wheels should come undone after a couple of tugs.
Step Two: Set the Truck aside
Once the tyre is removed, get the truck out of the way and place it in a secured place away from little fingers that could damage the truck or get hurt from it. This is an important step, especially if you work around children.
Step Three: Assess the Tyre’s Damage
Now, assess the tyre’s damage. Look closely, because once there is a small damage, it can easily start a rip or a tear that your tyres will not be able to go back from. As much as possible, you should closely examine your RC for damage before playtime or race day because a seemingly small complication can ruin your car’s performance, or worse, destroy it.
Step Four: Clean the Tyres
After assessing the damage, thoroughly clean up the dirt and debris that are stuck to the tyre. Wet a piece of rag with isopropyl alcohol and wipe the tyre off with it. Isopropyl alcohol is ideal for this kind of clean-up because it evaporates quickly and leaves no residue. You don’t have to be gentle with it; rub it as much as you can to clean it up so the superglue sticks nicely.
Step Five: Glue your Tyres
Using a thin superglue, glue the tyre to the wheel carefully by pulling the bead back and applying it directly. Be generous with the application and work your way around the tyre gently. This is a crucial step so take as much time as you need.
Tip: Use a BSI Insta-Cure Super Thin CA Glue for best results and for easier application use a glue applicator with a thin nozzle.
Step Six: Add a Second Layer of Glue
Once you have finished gluing the whole bead, put on a second layer of glue to help stick the tyre completely to the wheel. Once again, apply a generous amount of the thin CA all around. This layer will ensure that the tyre is securely stuck to the wheel, giving you plenty of playtime with your monster truck.
Step Seven: Let the Glue Dry
Allowing superglue to dry naturally is the best way to go when using it. Preferably, you should glue your tyres the night before you are using the car, or at the very least a couple of hours before running it somewhere. You have to let the superglue cure and harden to its maximum strength. Putting it on the truck wet and having superglue all flicked all over the place is not going to be a pretty sight and dealing with splatters of superglue is definitely going to be a pain in the butt.
Tip: If you need it to dry right away or you simply do not have enough patience to let it dry naturally, you can use an accelerant to speed up the drying process. Remember, though, that it might leave some white residue, so if you don’t like the idea of having white marks all over your tyre, this tip might not be for you.
Final Thoughts
It is as simple as that: with these small repairs and occasional maintenance, your car can live to fight another day. So if you have an X-Maxx, make sure to regularly check the bead on the tyres. If it needs fixing, you can always check out our YouTube channel for helpful videos and tips. Reglue the tyre if you have to; don’t be scared; if you’re consistently repairing and maintaining it, your tyres and inserts will surely last a lot longer.
Watch and learn!
Still a bit confused? Watch Brett as he walks you through the process of repairing the Traxxas X-Maxx Tyres.
There you have it! Knowing how to properly repair your RC can give it a much longer life, it is not a waste of effort, especially if it is going to save you a lot of time and money in the long run.
What do you want us to make a tutorial on next? Feel free to message us with your ideas!
Also, make sure to follow us on Facebook, Instagram, Twitter, and Twitch!